
Finished waist size
Please select from:
63cm 67cm 70cm 75cm
- To print our digital patterns you will need a PDF viewer to achieve the correct scale. Please open the file by Adobe Reader after downloading the file to your computer.
- Photoshop editing is unavailable.
Note about finished size: You need additional inches necessary in a garment over and above the body measurement for your comfort and mobility. Secure the breathing space!
Select 3 to 5 cm bigger than your actual waist size.
If you don’t find your size, you can increase the waist 2 cm by widening pleats 1 mm for each. ( Just make sure you also widen your belt, too.)
You will need:
NOTE: Use a fabric with a width over 135 cm (for your hassle-free of dividing patterns and joining fabrics)
Front fabric(※width over 135 cm)twice the length of your skirt +30cm
1 zip
1 set of hook and eye
1 reel matching thread
Recommended fabric: wool twill
Steps


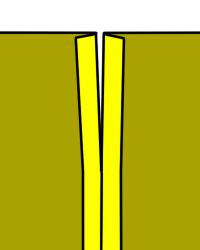
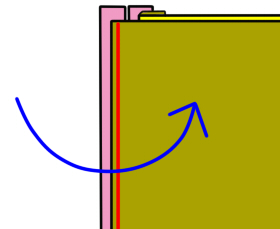
1. Place front and back skirt right side to right side.
(Pleats are in reverse direction like the picture above.)


Make sure pleats are made the same way!

You want the fabric width over 130 cm, but if your fabric is under 130 cm, follow the step below.
・Put the pattern on the fabric,

・Cut the pattern at the nearest placement line to the fabric edge with 1 cm seam allowance.

・Join together the pieces.
2. Overlock or zigzag stitch all the edges, and apply interfacing to the wrong side of the fabric as directed in the pattern.

3. Mark the symbols on the pattern through the fabric. (I recommend to use basting thread to make the mark visible from both sides of the fabric when folding pleats.)
Mark foldlines and placement lines using contrasting color threads.

Turn the fabric in along foldlines and bring edges to the placement lines. Press each time with an iron.
Make sure your iron is at an appropriate temperature to your fabric. (For example, high heat for cotton, moderately warm for man-made fabrics, low heat for wools.)
Spray a pleat solution to shape pleats stronger in place.


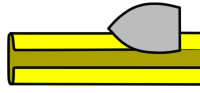
When pressing, please use a pressing cloth; it protects the textile from adverse effects caused by the heat of the iron like the picture above. Place small, hankie-size cloth between the iron and the fabric. Any cotton piece is fine!


Be careful not to break pleats, and roughly handstitch the top (with 5mm seam allowance)in place. Rough stitch is fine!※Leave last pleat unstitched for applying a zip.

Now lay your skirt front on top of your skirt back with right sides together and sew up one side seam of your skirt. (the side you’re going to attach a zip) Leave gap for a zip.
For new sewers, basting before machine-sewing is helpful.

Press the seam open where you apply the zip.
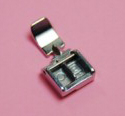
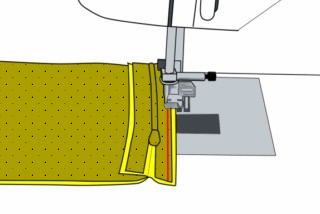
Change your sewing-machine foot to “zip foot”. It’s like in this shape although it may look a bit different depending on machine brand.

Place the back skirt seam onto a zip, facing up.
Please leave 3mm gap between zip teeth and folded edge of the skirt.
Stitch along with 2mm seam.
New sewers can baste prior to machine stitch!
 縫い代の折り目をぴったり合わせてください。Match the seam
折り目の位置を合わせたまま前スカートを後スカートに重ねてください。
ファスナーの近くを縫ってください。
スカート側から縫いにくいときはしたのイラストのようにファスナー側を上にすると縫いやすいですよ。

反対側の脇を縫ってください。
ウエストベルトを縫ってください。
ウエストベルトの縫い方手前

For the waistband, fold the seam allowance with an iron.
Fold in half.

Please remember to apply interfacing to the waistband. Otherwise, the waist won’t be strong enough!
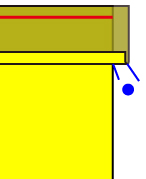
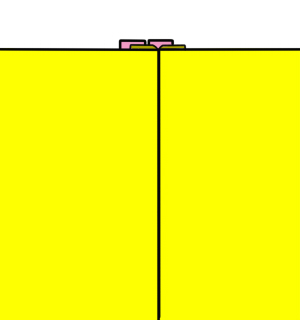
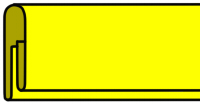
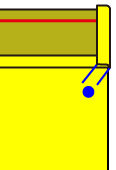
Place the band and the skirt right side to right side.
スカートよりベルトが●=1cmはみ出すように重ねて縫ってください。
 このときベルトとスカートのウエストが合わないことが良くあります。
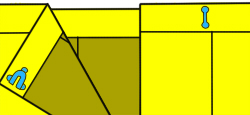
例えば20本ヒダのスカートの場合全てのヒダが1mmずれただけで
2cmサイズが変わります。
型紙どおり、計算どおりに作ろうとしても、機械ではない手作業なので、生地は若干伸縮するし、印しつけもずれることあるし折るときにもずれたりするし、布の厚みが影響したりします。
そういう時はヒダの上側の折り目の位置をずらして調整してください
 両端の縫い代を裏へ折ってください。
 スカートの縫い代をベルトで包んでください。
ベルトを縫ってください。
 Apply hook and eye fasteners on the wrong side of the fabric.
カギホックのつけ方
How to stitch a hook and eye
ヒダを広げて裾をアイロンで折ってください。


Stitch the hem.
Done!